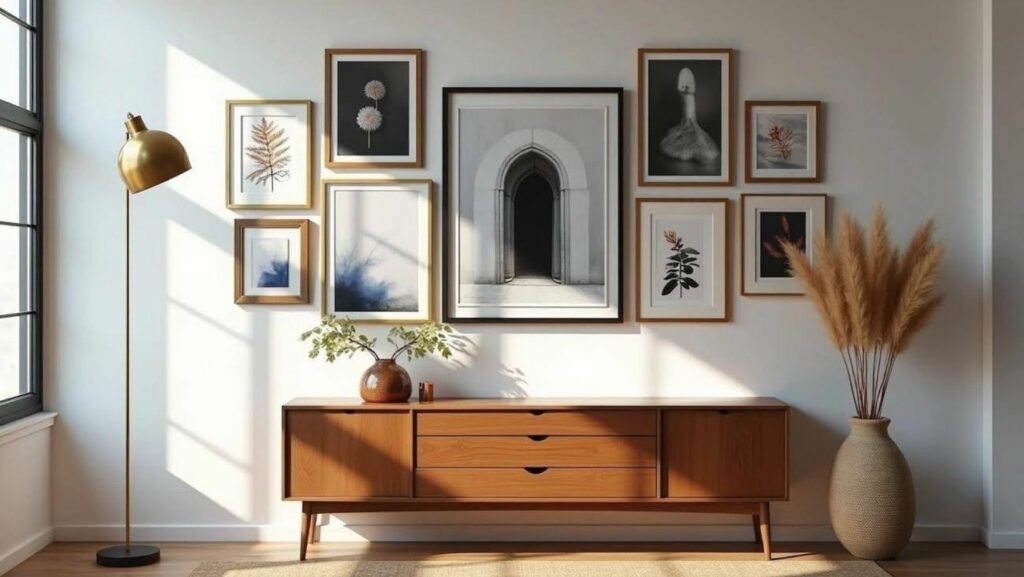
Gallery walls have stood the test of time and remain as classic and enduring as hardwood floors or elegant marble accents. A customized art display can refresh your living room or add character to a hallway, while offering an engaging way to showcase your inspirations and ideas.
Creating a well-curated gallery wall goes beyond hanging pictures. Your story emerges through carefully selected pieces that reflect your personal values and experiences. The space changes from ordinary to one that genuinely feels like “you” when you select meaningful items. A simple principle of keeping about 3 inches between pieces distinguishes a professional-looking arrangement from a cluttered display.
This piece will give you practical photo wall ideas for large expansive walls. You’ll learn everything from original planning to final arrangement. Large spaces with multiple pieces let you experiment creatively with different frame styles.
Start with a Plan for Your Wall
Proper planning is vital before you start with hammer and nails. Your gallery wall should make the best use of your wall space.
Measure your wall dimensions
Start by getting your tape measure to record accurate dimensions. Your wall’s exact measurements will make or break your planning success. Precise numbers matter a lot for large walls. A homeowner once worked with a 17-foot-long wall that had 10-foot ceilings to balance their 81-inch couch and large artwork. Your art collection should be proportionate to your wall size. The arrangement should use as much wall space as possible without looking cramped.
Decide on the shape and layout
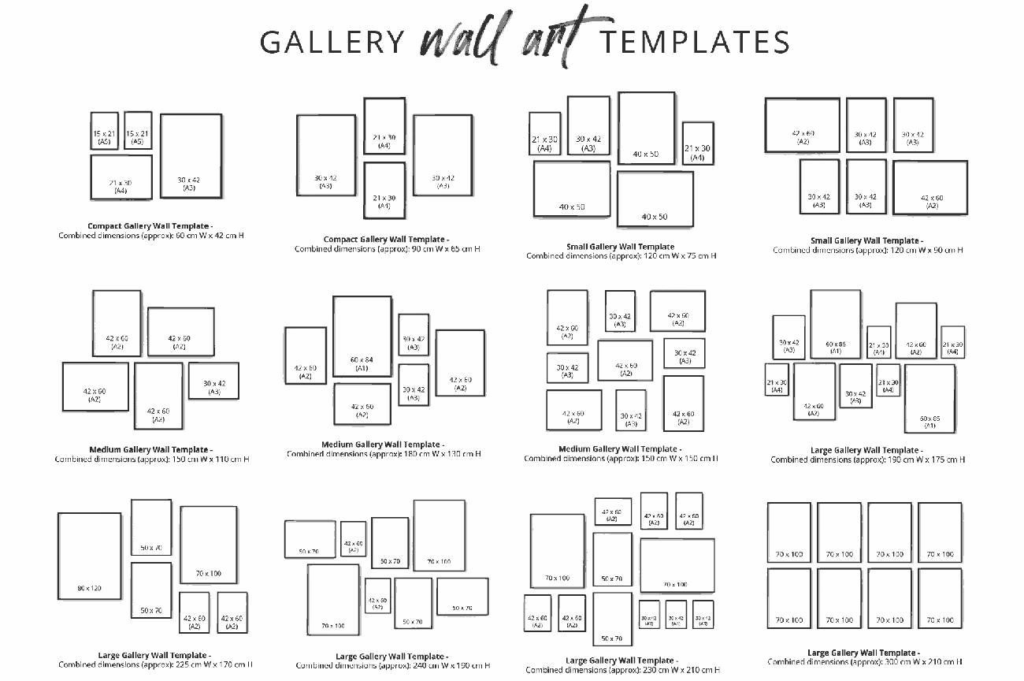
After getting measurements, pick an overall arrangement. Here are some options to think over:
- Grid layouts work well with similarly sized pieces
- Centered arrangements need one large anchor piece with smaller works around it
- Salon-style organic groupings suit eclectic collections
The best results come when you use your largest piece as the focal point. Medium and smaller pieces can then be arranged around it. Not sure where to start? Browse through photo wall ideas on Pinterest or design blogs to find layouts that match your space.
Use paper templates or floor mockups
This step helps avoid unnecessary holes in walls and prevents disappointment. Many designers suggest making paper templates of each art piece before placing nails. Cut kraft paper or newspaper to match your frames’ exact dimensions. You can then tape these templates to your wall with painter’s tape to see how it looks.
The floor can also be your planning space. This technique lets you play with spacing – 2-3 inches between pieces gives enough visual breathing room. Take a photo of your floor arrangement to use as reference.
Want more precision? Mark the center of your wall at 57 inches from the floor – that’s standard gallery height. Note that art should hang 6-10 inches above furniture. This creates a visual connection without crowding the space.
Choose and Arrange Your Art Pieces
A well-arranged collection of frames can turn into an eye-catching gallery wall. Your layout plan is ready, so let’s dive into choosing and placing your artwork.
Start with the largest piece
Your largest artwork should serve as the foundation of your display. Place this key piece slightly off-center to add visual interest. This smart positioning guides viewers’ eyes through the entire composition instead of fixing their gaze on the center. A single oversized piece on big walls can make your space appear more expansive by creating a strong focal point.
Balance with medium and small pieces
Build your display outward naturally after setting your foundation piece. Different sizes should blend together seamlessly to avoid a boring look. Keep your large pieces apart to maintain visual harmony. Small frames fit perfectly in those tricky gaps between bigger pieces. Most designers suggest keeping 2-3 inches between frames to achieve a clean, deliberate appearance.
Mix vertical and horizontal orientations
Your gallery wall needs a good mix of portrait and landscape orientations to create visual rhythm. Don’t place too many pieces with similar orientations next to each other. Vertical pieces pull attention upward and shine in narrow spaces. Horizontal artwork helps stretch the room visually and connects larger furniture pieces. If you’re working with a wide wall or above a long sofa, long horizontal wall art can make a bold yet balanced impact. This mixed approach makes the hanging process and spacing much easier.
Create mini clusters or grids
Mini-groupings within your main display can add sophistication. Similar-sized pieces work great side-by-side as a triptych or grid pattern. These smaller arrangements create interesting focal points in your overall display. A symmetrical grid looks stunning with matching frames. You might also try grouping 3-4 items together to make an impact without overwhelming the space.
Add Depth with Frames and Objects
Gallery walls stand out from simple displays through their dimension and visual interest on large surfaces. You can create depth beyond a simple arrangement with these techniques.
Mix frame styles and colors
The frames matter just as much as the artwork they showcase. Mixed and matched styles create an eclectic look, while contrasting white or black frames help images pop. You can combine wood and metal frames to add visual appeal. Understanding complementary colors helps you play with frame combinations effectively. A pink frame needs black ones to balance it and make darker frames stand out. Your display needs repetition of frame styles for cohesion – a single white frame looks like a mistake, but three make it look intentional.
Include sculptural or textile elements
Sculptural elements bring unmatched depth and texture to wall displays. Their three-dimensional nature creates a visceral impact through light and shadow interplay. Shadow box techniques let you display embroidery hoops without mounting, gluing, or sewing anything. Sleeve and slat systems work well with larger art quilts. Framed fabric creates striking statement pieces by bridging soft textiles and structured decor.
Use round or irregular shapes for contrast
Round frames or irregularly shaped pieces break up the monotony of rectangular layouts. Round objects add organic flow between angular frames throughout your arrangement. Curved elements provide pleasing visual contrast that guides the eye around geometric layouts.
Try float mounting for special items
Float mounting makes artwork appear to float inside its frame by raising it on a platform off the backing board. This technique works best with pieces that have interesting edges, textures, or artist signatures. We used it mostly for watercolors on heavyweight paper, as it casts dramatic shadows while showing off raw edges. Professional archival-quality materials protect artwork without permanent adhesion.
Make It Personal and Cohesive
A gallery wall’s true magic comes from telling your personal story while creating visual harmony. These displays showcase your personality and style, so they need thoughtful execution beyond simple decoration.
Stick to a color palette
The key to a cohesive look starts with matching colors. You can create harmony by picking one color from your art and using it in nearby furniture or accessories. To name just one example, see how rust-orange artwork looks amazing with matching pillows. You could also keep a consistent tone throughout—neutral paintings with blues and gold accents go together with one another. Even with pieces from different styles, a unified color scheme brings everything together visually. Some designers suggest turning photos black and white to create an instantly cohesive gallery wall.
Include personal photos or mementos
The most remarkable gallery walls feature meaningful items. You can mix family photos with other artwork types to add depth and visual interest. Designers often suggest displaying heirlooms, travel souvenirs, or children’s artwork in shadow boxes. Unique items like hand-painted ornaments, cocktail napkins from special occasions, or ultrasound images make the display special. Note that almost anything becomes display-worthy if it holds personal meaning.
If you’d like to create a piece yourself, try browsing a paint by numbers shop for easy-to-follow kits that let you turn your own hand-painted artwork into a meaningful part of your wall.
Use photo wall ideas for inspiration
Let’s take inspiration from proven gallery wall styles. Grid layouts with matching frames create clean, uniform looks that work perfectly in entryways. Eclectic arrangements shine in hallways and staircases. The 2025 trends point toward more color and texture, rich antiqued frames, and textural linen accents. You might want to try petite two-piece arrangements for minimalist appeal, or combine frames with three-dimensional objects like ceramics.
Conclusion
A well-planned gallery wall can transform a large space into something personal and visually striking. Start by measuring, choosing a layout, and anchoring with your largest piece.
Add variety with different sizes, orientations, and textures. Use a consistent color palette, and include meaningful items like photos or souvenirs to make it your own.
There’s no need to follow strict rules. Let your wall grow naturally and reflect what matters to you.